Passhub
As a replacement for LastPass, we have purchased a PassHub for Business instance, https://teachfirst.passhub.eu/, and it is now ready for use. To get started, we recommend that you follow these steps:
- Request access to the application by raising a support ticket at https://support.teachfirst.org.uk/
-
Install and initialize the WWPass Key app on your smartphone. For added security, we recommend that you set a short and easy-to-remember PIN (We recommend writing the PIN down and keeping it safe, otherwise you may lose access to your safes that are not shared with others)
- Google Play Store - WWPass Key – Apps on Google Play
- Apple App Store - WWPass Key on the App Store (apple.com)
-
This step is vital- if you do not set up a backup, then you can lose access to password safes if your phone was lost/stolen/broken
- As soon as possible set up the backup option by following the instructions in the app and enter your personal email address
- On your desktop, open https://teachfirst.passhub.eu/and scan the QR code using the WWPasskey app.
The other really important bit of information is regarding sharing safes, please ensure that every shared safe has at least two owners - otherwise data can be irretrievably lost.
You can find out how to share a safe later in this article.
Add a Password Safe
A password safe is a top-level folder that contains login records, notes, files, and other folders.
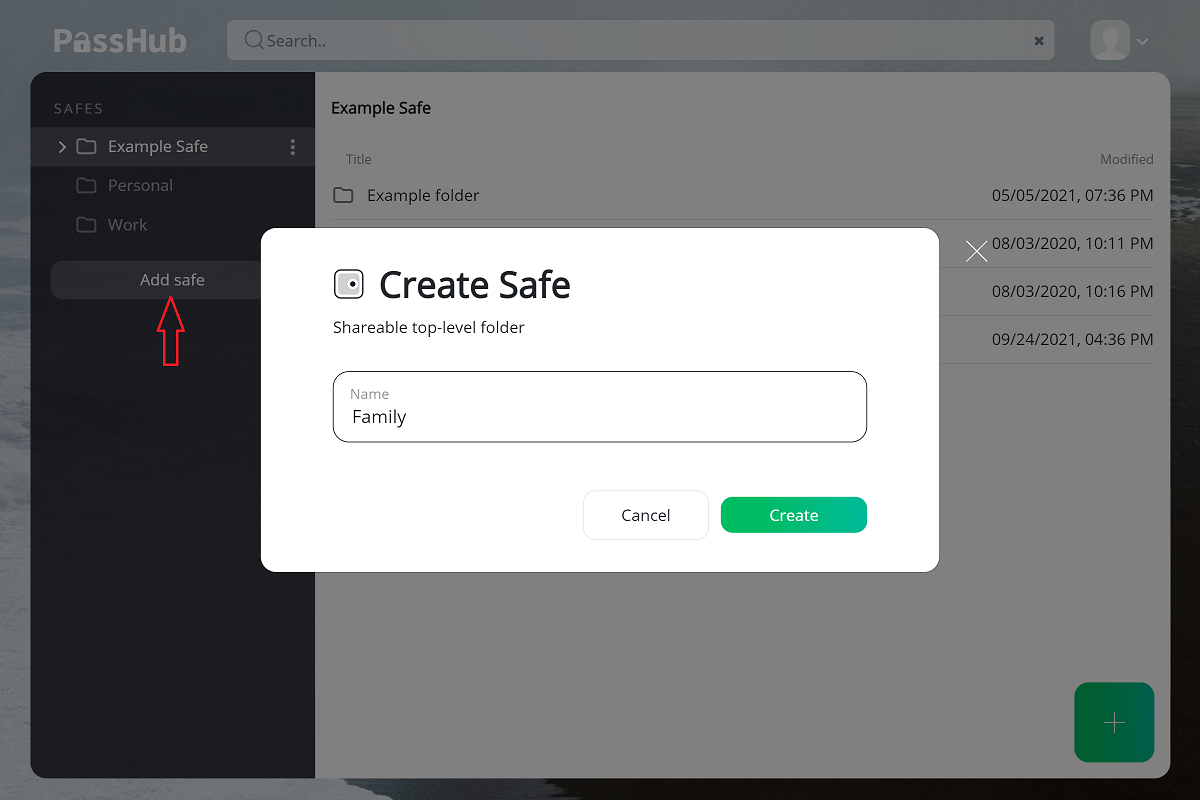
Click Add Safe button and enter any safe name you like
Add new record
To add a new record, click the  Add button. When you're on a mobile device, tap the safe name to get to the safe content and click the Add button. Select Password, Note, File, Card or Folder in the drop-down menu.
New password record
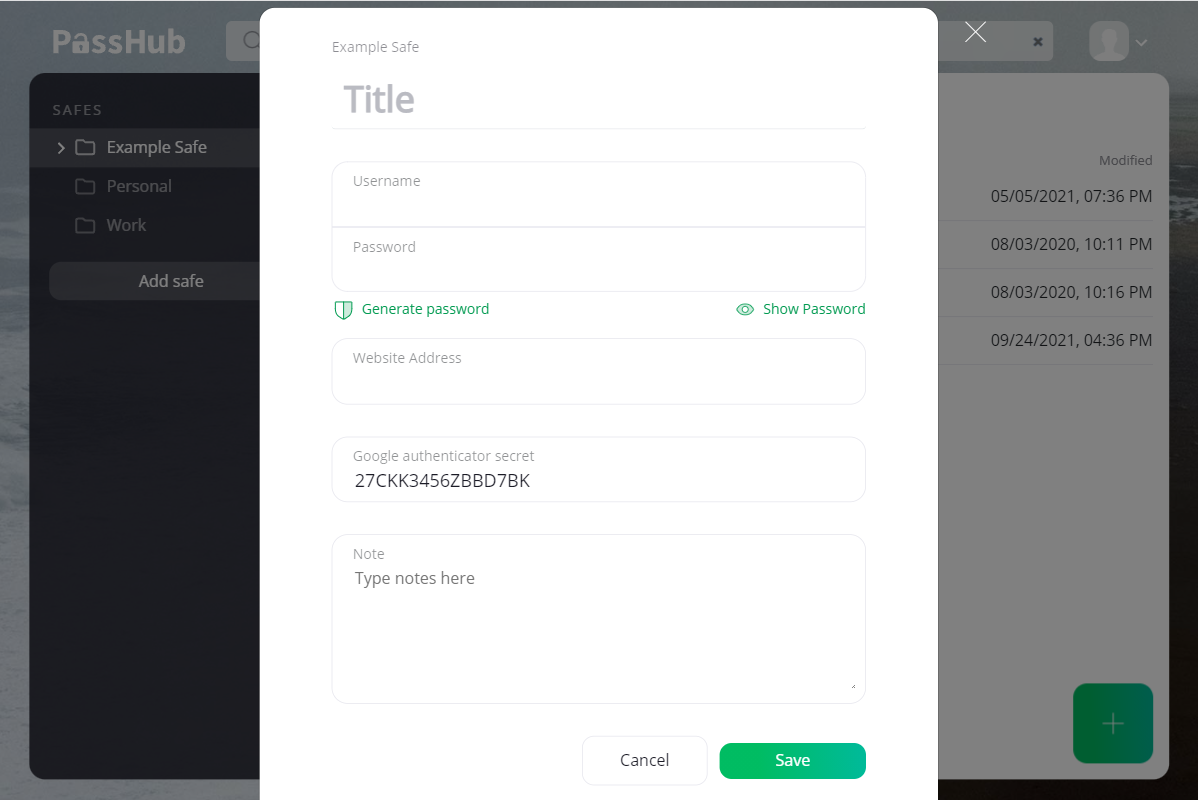
Fill the form shown below, where
-
Title - identifies the account entry. It is the only required field in the form.
-
Username/password - the credentials of the account. Use the provided random password generator to get a strong password. Just click Generate Password.
-
URL - network name or IP address of the resource.
-
Notes - specific notes, instructions, or other messages are safely encrypted and stored with each entry.
New note
Note is a special type of record to store arbitrary not structured texts. The Note dialog contains only the Title and the Notes fields.
New file
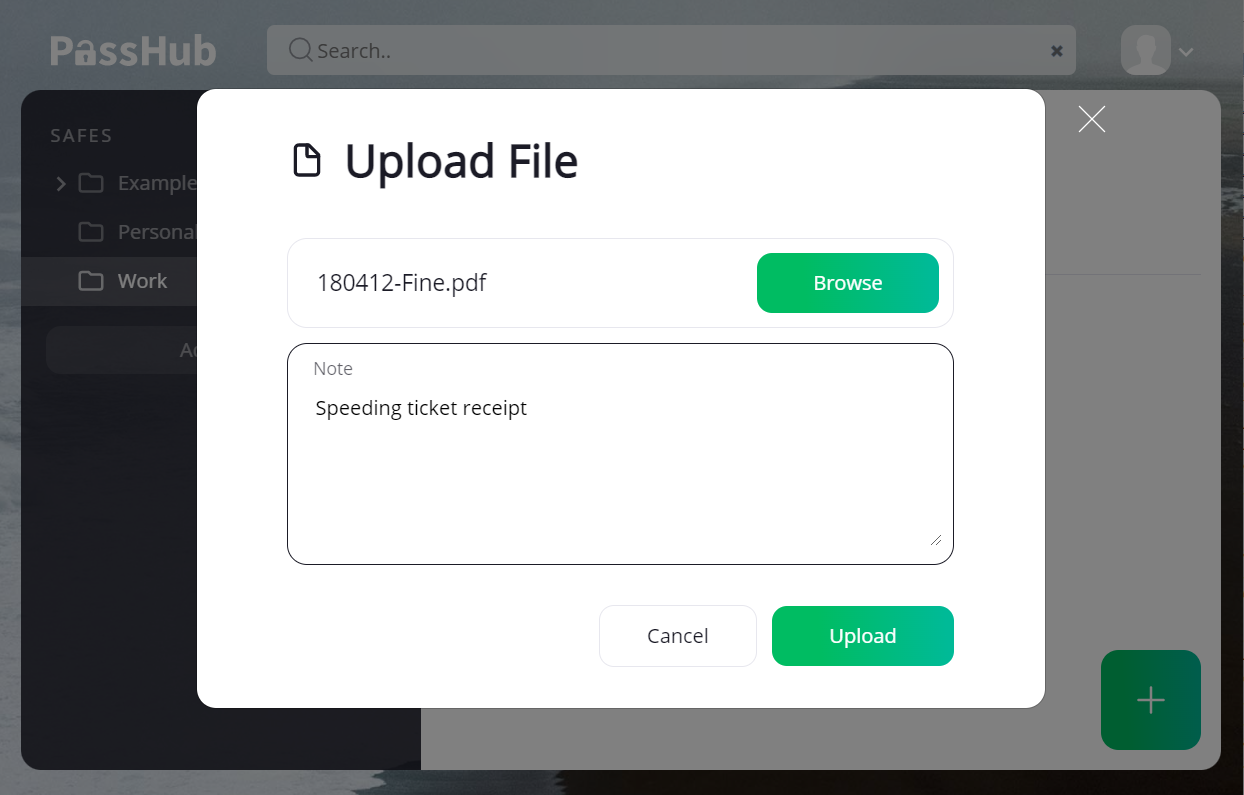
You can store files in PassHub too. These may be sensitive documents you share with clients or partners, SSL certificates used widely in IT, and so on. File names and content are encrypted the same way as all the other data in PassHub.
Click the Browse button to select a file, or, on a desktop, just drag the file into the filename filed. Optionally add notes. Later notes can help in search. Now click the Upload button.
New Credit Card
Storing credit card data is quite straightforward: just put the credit card number, owner's name, CVV, and expiration date into the corresponding fields.
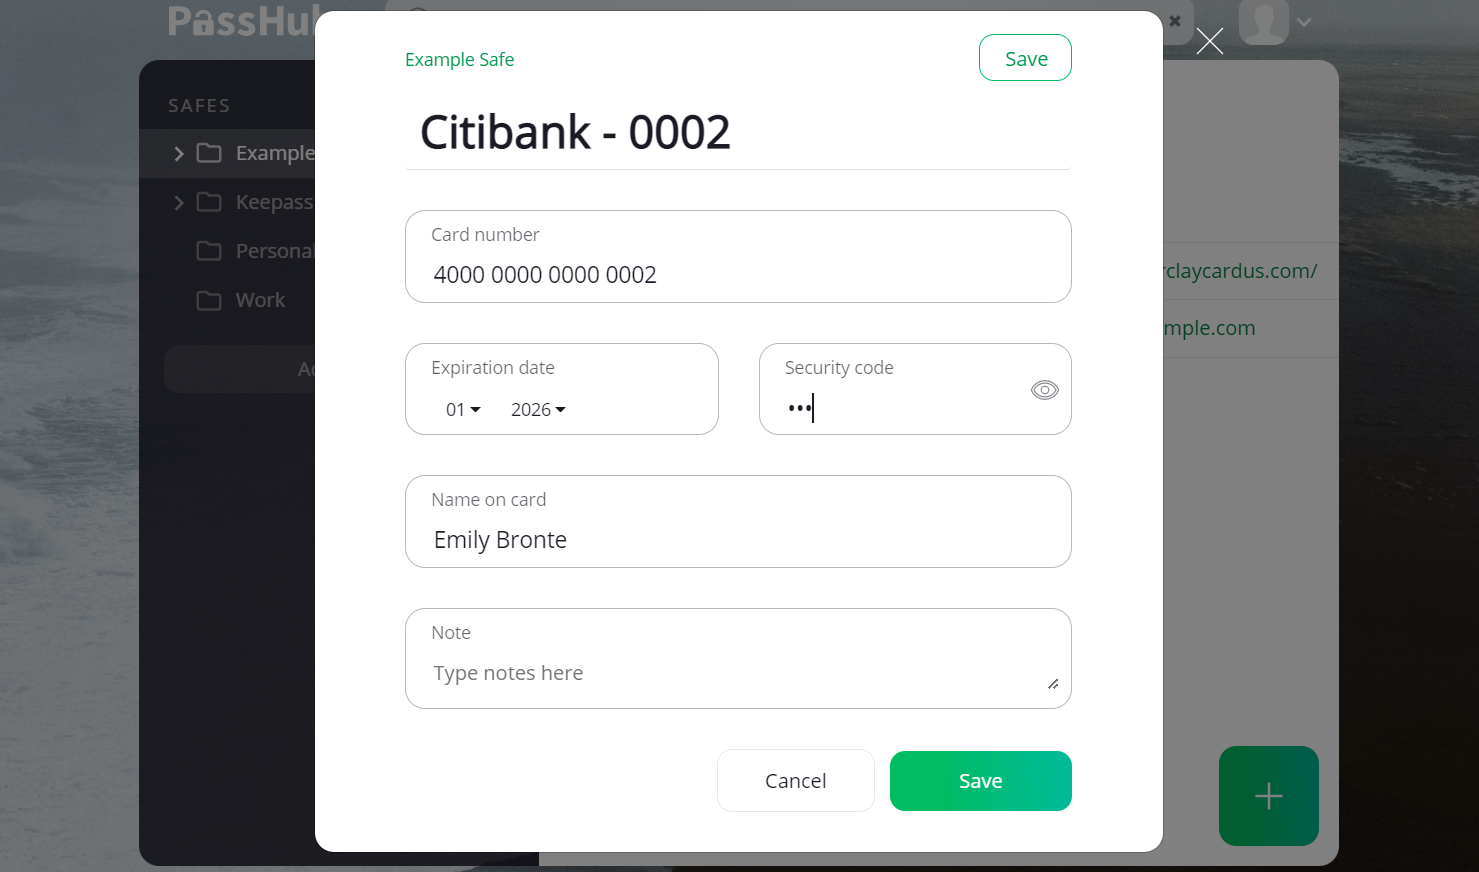
You can use PassHub.net browser extension to automatically fill in the card data on the payment page, e. g. when you shop online. For details, see the Browser extension page.
Copy/move records to another
safe or folder
There are two ways to move records from one folder/safe to another
Drag and Drop
To move any password, file, note, or bank card record, use the standard procedure: "grab" the record and "drag" it to the destination folder. That's it.
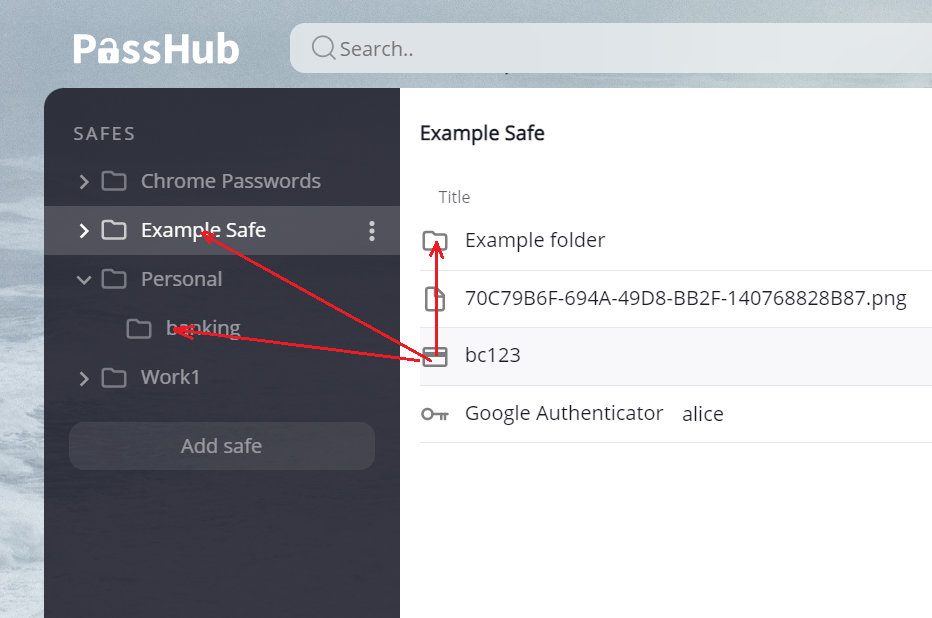
- You can only move records this way. To copy records, use the Copy/Paste method below.
- Drag and Drop is not available on mobile devices. Again, Copy/Paste works.
Copy/Paste
Click on the record title to open its dialog and select Move or Copy icon
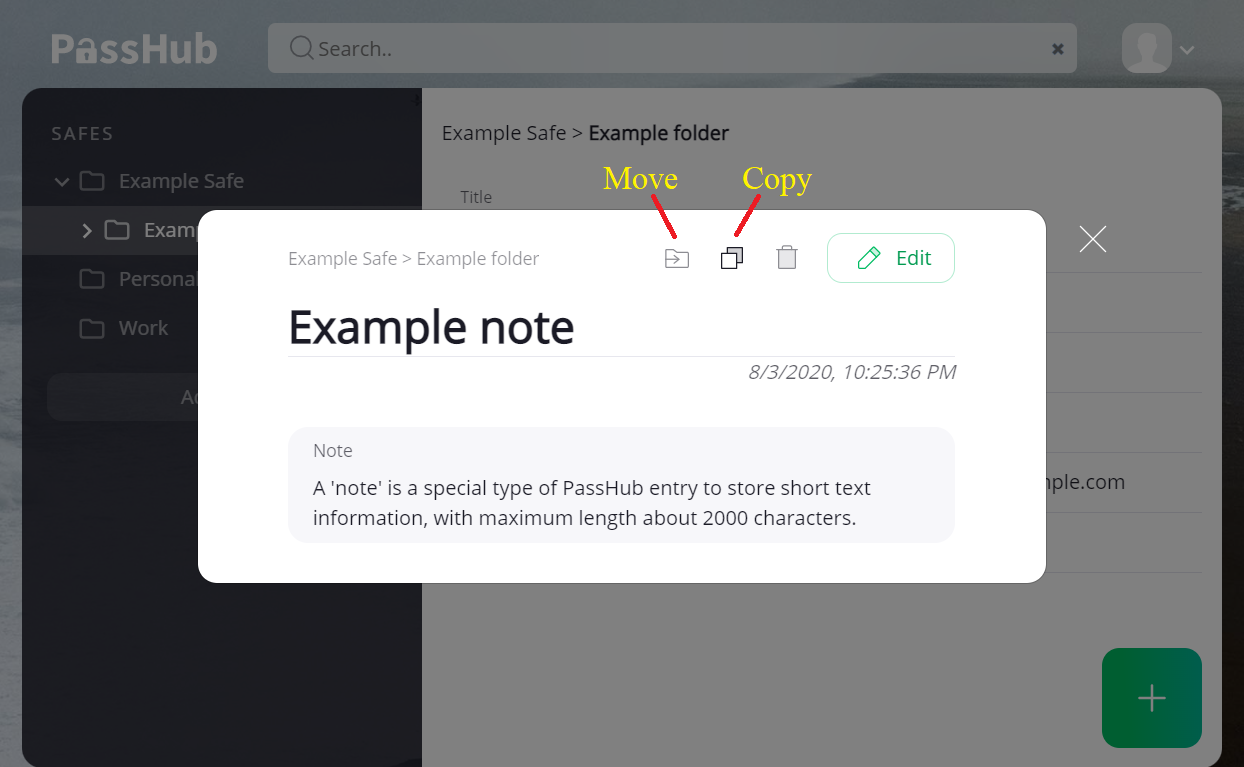
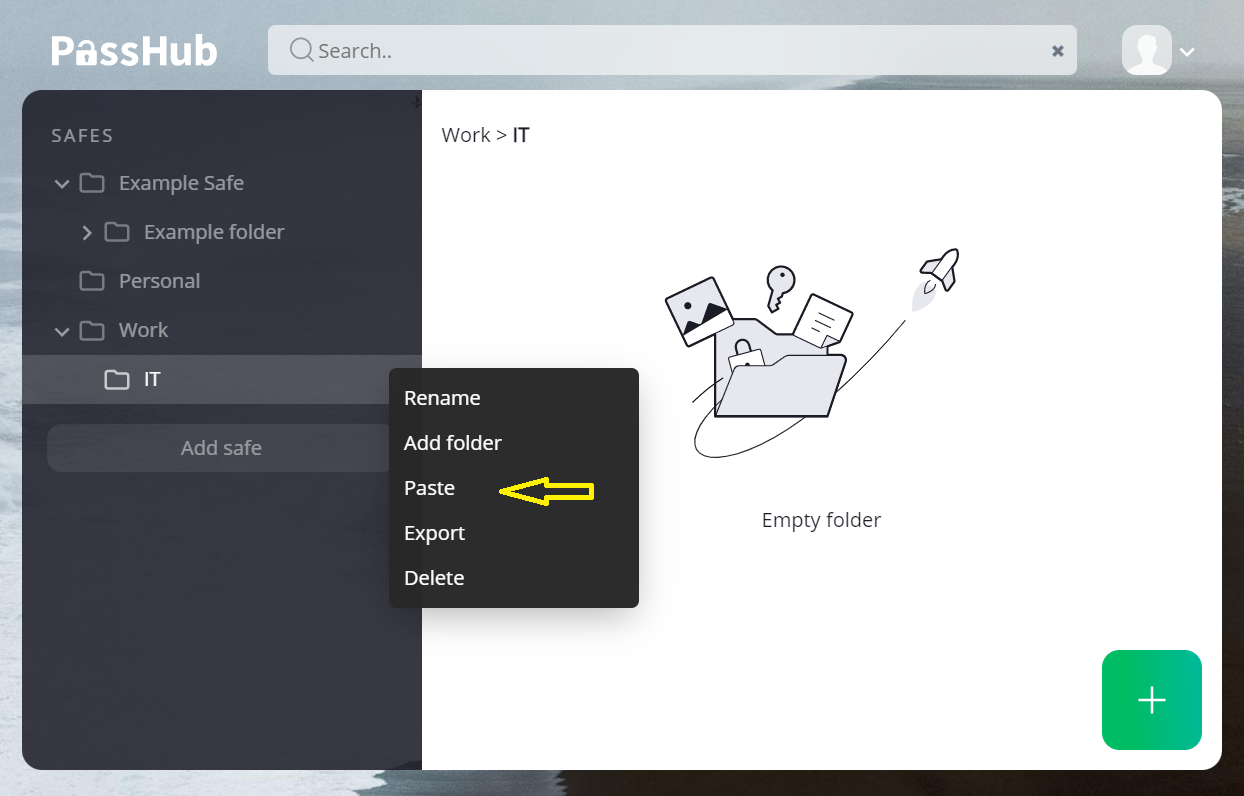
Now open the menu of the destination safe or folder. The Paste command becomes active. Select Paste and the entry will be copied or moved to a new location.
Please note, that the Paste command is only active for 30 seconds after you click the Move or Copy.
Share my password safe
with others
You can share your records by granting other users access to the selected password safe.
When you share a safe, the recipient account is identified by the email address. Hence it is only possible to share safes with users who already have PassHub.net account and provided their email.
Please contact IT Infrastructure via the normal support channels to get new users added.
You may grant one of the three levels of access rights to a recipient:
- read-only: the user may only read the safe data
- editor: the recipient can create, modify or delete safe records
- owner: full access to the safe, the user may share the safe, revoke access, change user roles and even delete the safe
To share a safe
Click on the safe name and select the "Share" item in the drop-down menu
Insert recipient mail and choose access rights. Click Share Safe button.
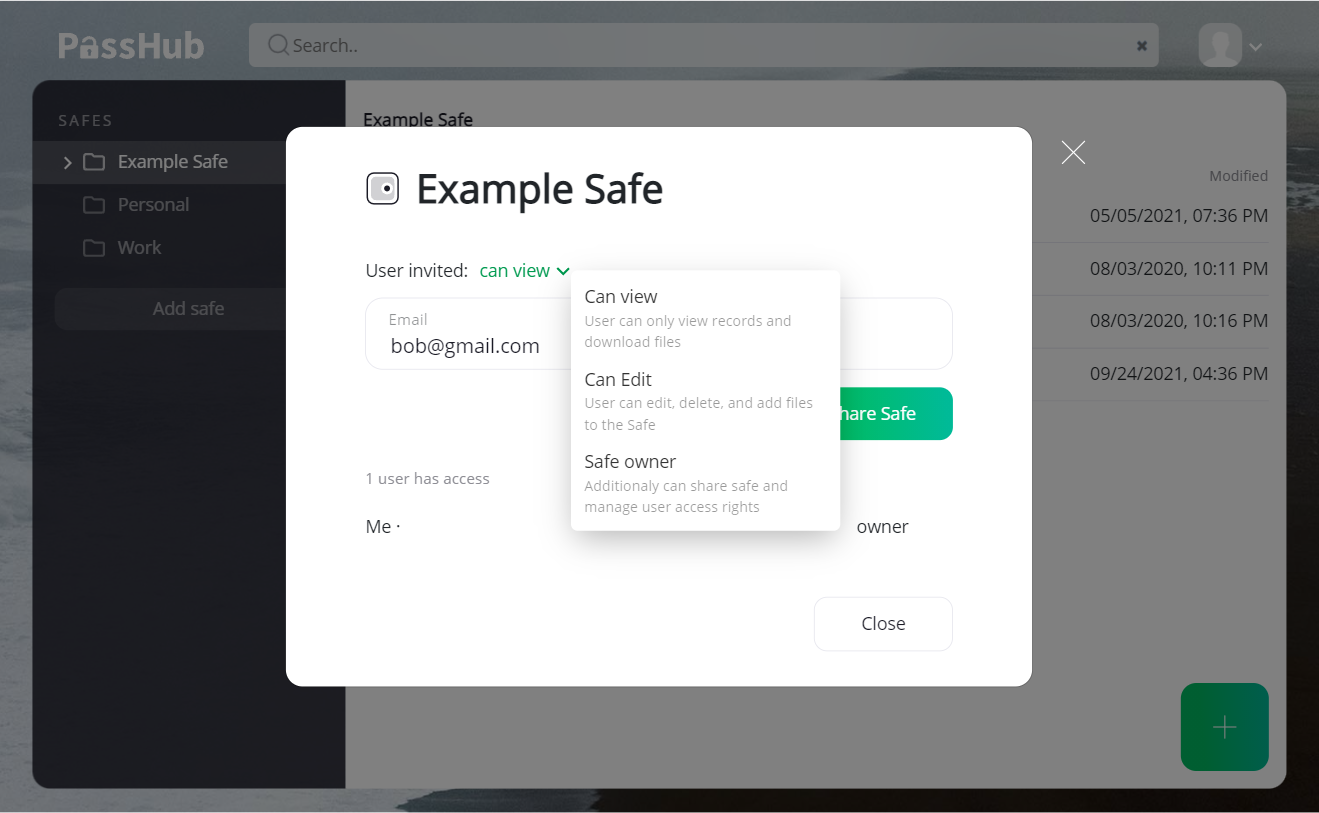
Note the icon changes for the shared safe. Basically, that is it. Next time the recipient updates the PassHub data, the shared safe will be shown.
The safe name may be different for each user: if Alice shares the safe with Bob, it would be natural to have the safe named 'Bob' or alike. At the same time, Bob may want to call the safe "Alice." So Bob can change the name of the safe shared by Alice and the safe will still be named "Bob" in the Alice account.
Backup and restore my records
Export your records in XML or CSV file and import them later.
Export/Backup
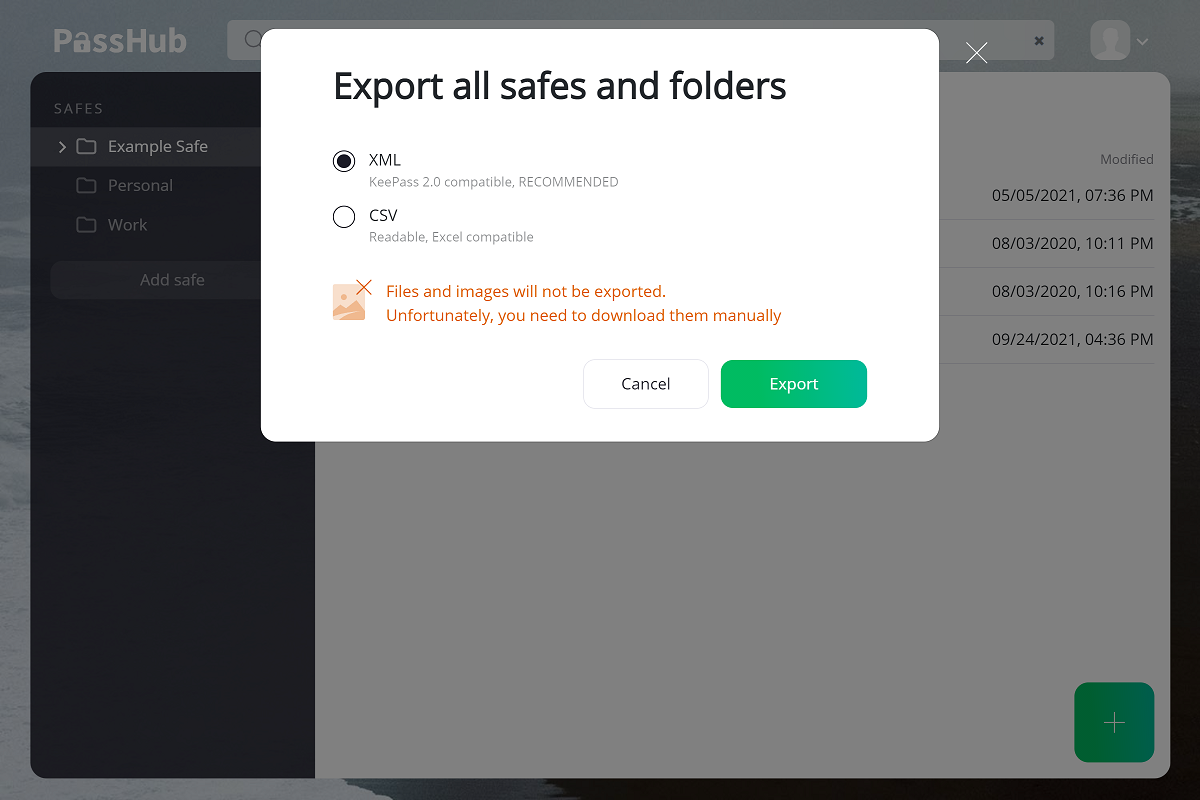
- Export all safes (backup): select Export in the Account drop-down.
- Export a single safe: click Export item in the safe menu.
In the provided dialog, choose one of the two file formats - XML or CSV. For backup/restore purposes, XML is highly recommended. Use CSV only for compatibility reasons or to get the exported data in a human-readable form e.g. to put them into an Excel table. CSV is error-prone, does not preserve real data structures, and suffers compatibility issues.
Import/Restore
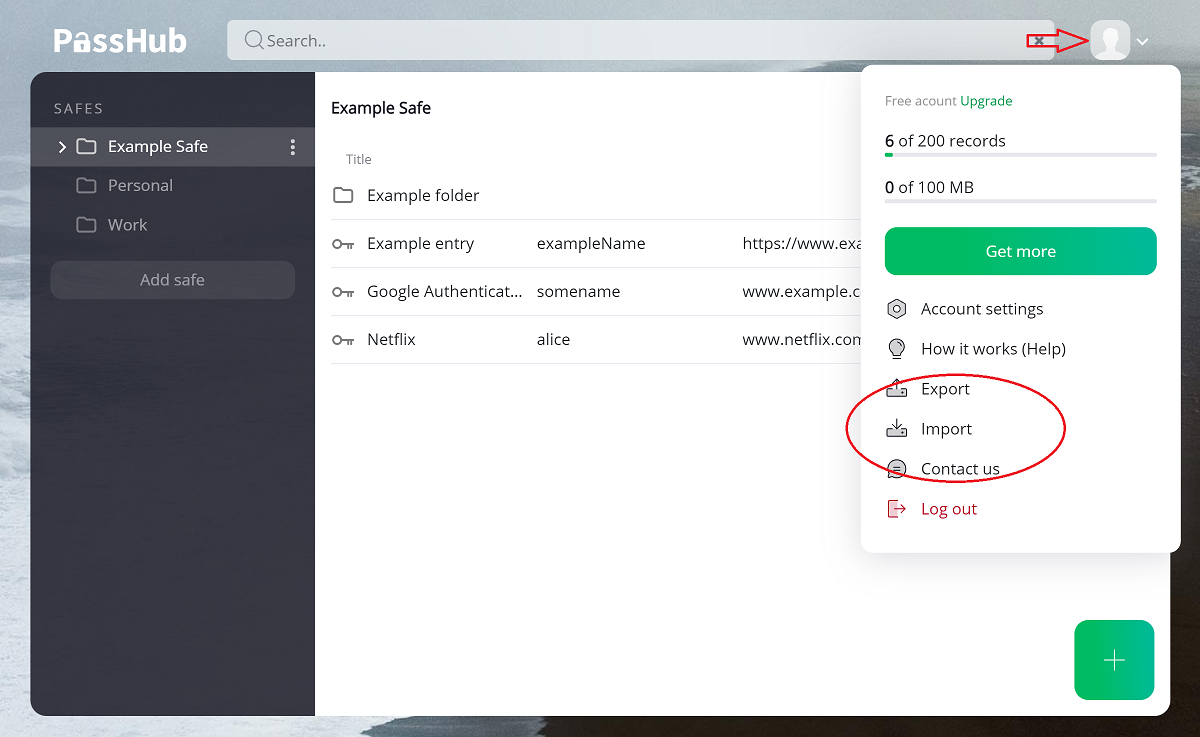
Select Import in the Account drop-down
Select mode: Import (puts file data into a newly created single safe) or Restore (merges file data with existing safes) Select the file you wish to upload
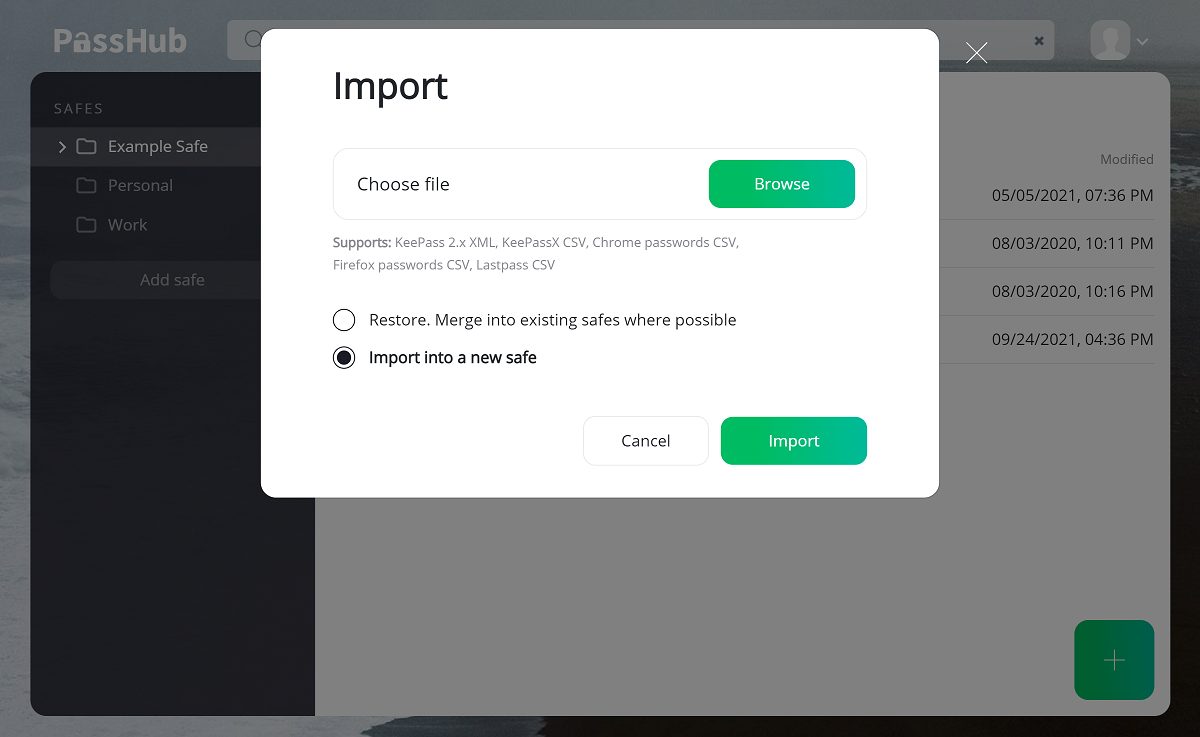
NOTE: Restore mode preserves all the data you have in PassHub, it can only add new records or additional versions of existing records. It never deletes or modifies the existing data.